Breathe Life into Your Displays with the Arduino Print Class
Introduction
Have you ever created a display and then found yourself struggling to write conversion functions just to print text strings and numbers?
Worse yet, have you built a second display and had to repeat the exact same process?
If you’ve spent countless hours hunting down and fixing bugs in those conversion functions, you’re not alone.
You might be thrilled with your display itself, but feel limited and frustrated by the output. It’s a common problem – we’ve all felt like we’re constantly reinventing the wheel, and sometimes that wheel isn’t even round!
Wouldn’t it be amazing if there was a nearly automatic way to get your display printing correctly, professionally, and without having to start from scratch every time?
Well, I have good news!
1. First, this mechanism does exist: it’s the Arduino’s Print class.
2. Second, in this article, I’m going to show you how to use it with your brand-new display.
Keep reading – you’re just one function away from taking your display to the next level.
The Arduino’s Print class is your key to bringing your display to life.
Imagine doing this on your sleek new display (whether it’s 7-segment, with a decimal point, or 8-digit):
MyAmazingDisplay myLCD( /* initialization */ );

myLCD.clear();
// You provide this feature

myLCD.print( "HI THERE" );
// Output: [HI THERE]
// Arduino takes care of the details

myLCD.print( 12345 );
// Output: [12345___]
// Arduino takes care of the details

myLCD.showDP( 3 );
// Output: [123.45___]
// You provide this feature
As you’ll see, the class that models your display only needs to provide an entry point for the magic to happen. You can also add helpful auxiliary functions like .clear(), .showSymbol(), and so on.
Fun Fact: Arduino’s Serial and LiquidCrystal classes use this very same mechanism. You can even extend it to I2C and SPI buses!
Concepts
So, what do you need to integrate printing capabilities into your awesome new display?
- You’ll need your display driver. The Print class doesn’t handle that for you.
- You’ll need to create a class that represents your display and inherits from the abstract base class Print.
- You’ll need to implement the pure virtual method Print::write().
- You can also add any auxiliary or utility functions you want.
- Finally, you get to enjoy your enhanced display!
Since this article isn’t about display drivers, I won’t go into too much detail here. However, you can see what I used for today’s discussion in the complete example.
Let’s start with a bit of theory to provide context for what’s coming next. If you’re already familiar with these concepts, feel free to jump ahead to the development section.
Pure Virtual Methods
A pure virtual method is a member function of a class that is declared as virtual, set equal to 0, and has no implementation (meaning it has no code):
struct AbstractBase
{
   // Pure virtual method:
    virtual void method() = 0; // No code

   // Regular method:
   void other_method(){ /* body */ }
};
The implementation (the code) of the pure virtual method will be written in the classes that inherit from the class that contains it. 1
Abstract Base Classes
An abstract base class is a class that contains at least one pure virtual method. You can’t create objects directly from classes that have one or more pure virtual methods. Their main purpose is to serve as a base class.
Classes that inherit from an abstract base class must implement the code for the pure virtual method(s).
struct AbstractBase
{
    virtual void method() = 0;
};

// Your class:
struct Derived : public AbstractBase
{
   // Your code:
    virtual void method() override
    {
        // method body
    }
};

AbstractBase b(); // Error
Derived d();      // Ok
// ...
d.method();
Think of abstract base classes and pure virtual methods as a contract: the base class defines what needs to be done, and the classes that inherit from it provide the code for how to do it.
Note: When an abstract base class contains only pure virtual methods (and no member variables), it becomes, conceptually, an interface. Interfaces are an advanced concept in object-oriented programming and are incredibly useful in embedded systems. I’ve written about interfaces before (here) as a way to create interchangeable components.
The Arduino’s Print Class
So, what do pure virtual methods and abstract base classes have to do with our display?
As I mentioned earlier, the Arduino platform provides the abstract base class Print, which handles all the necessary number and text conversions for you. The connection point between this class and your code is the pure virtual method .write().
Going back to our contract analogy, the Print class gives us the conversion functions, as long as we agree to provide the code for the Print::write() method.
Let me show you a simplified version of the Arduino’s Print class to highlight the parts we’re interested in:
// Print.cpp

class Print
{
  private:
    // ...
  protected:
    // ...
  public:
    // ...

    // This is the pure virtual method that we're going to implement later:
    virtual size_t write(uint8_t) = 0;

    // ...

    // Once the .write() method has been overrided in your class, you'll have
    // access to all this functionality without writing a single line of code.
    // How cool is that?:

    size_t print(const __FlashStringHelper *);
    size_t print(const String &);
    size_t print(const char[]);
    size_t print(char);
    size_t print(unsigned char, int = DEC);
    size_t print(int, int = DEC);
    size_t print(unsigned int, int = DEC);
    size_t print(long, int = DEC);
    size_t print(unsigned long, int = DEC);
    size_t print(double, int = 2);
    size_t print(const Printable&);

    size_t println(const __FlashStringHelper *);
    size_t println(const String &s);
    size_t println(const char[]);
    size_t println(char);
    size_t println(unsigned char, int = DEC);
    size_t println(int, int = DEC);
    size_t println(unsigned int, int = DEC);
    size_t println(long, int = DEC);
    size_t println(unsigned long, int = DEC);
    size_t println(double, int = 2);
    size_t println(const Printable&);
    size_t println(void);
};
The Display Driver
This article focuses on using the Print class, not on creating display drivers. However, to make this discussion meaningful, we need a test display. Here are the key parts of the class that implements my display’s driver (you can find the complete code in the example):
// Display_HC595.hpp

#include "Print.h" (1)

class Display_HC595 : public Print // (2)
{
   private:
      // ...

      using Print::write;
      virtual size_t write( uint8_t car ) override; // (3)

   public:
      Display_HC595( const uint8_t* _cathodes, const uint8_t _num_digits, const uint8_t _latch_pin, uint8_t _decimal_point, uint8_t* _memory_frame ); // (4)

      // ...

      void begin(); // (5)

      // Auxiliar functionality that isn't part of the Print class, but it's needed for our display:
      void clear();
      void setCursor( uint8_t pos );
      void showDP( uint8_t pos );
      void hideDP( uint8_t pos );

      // This kind of display must be refreshed periodically:
      void update();
};
Let’s break down the code snippets:
- We include the header file for the abstract class Print.
- We inherit from the abstract base class Print.
- We declare that we will implement the pure virtual method .write().
- We initialize the object in the way that best suits our display.
- Traditionally, the
.begin()method is used for hardware initialization.
Implementing the Print::write() method
So, what does the .write() method actually do?
It handles whatever is necessary to print a single character at a time. All of the .print() and .println() methods provided by the Print class use this .write() method to output characters to the display. How each character is managed depends entirely on the specific nature of your display.
In my driver, I use an arrangement that works like «video memory» (I call it memory_frame). This is where the methods write each character (meaning they write to RAM instead of directly to the hardware). Then, the .update() method, which must be called regularly, takes a character from the video memory and writes it to the hardware.
Here’s how I implemented the .write() method in my driver:
// Display_HC595.cpp

size_t Display_HC595::write( uint8_t car )
{
   // handle everything, but the decimal point:
   if( car != '.' )
   {
      if( this->cursor >= this->len ) this->cursor = 0;

      if( car == '\n' )
      {
         this->cursor = 0;
      }
      else
      {
         // I don't write directly into the hardware, I do it into RAM instead:
         this->memory_frame[ this->cursor ] = encode( car );

         ++this->cursor;
      }
   }

   // handle the decimal point:
   else
   {
      if( this->cursor > 0 )
      {
         this->memory_frame[ this->cursor - 1 ] |= this->decimal_point;
      }
      else
      {
         this->memory_frame[0] = this->decimal_point;
         ++this->cursor;
      }
   }

   return 1;
}
If your display already has RAM, like a 16×2 LCD, then you can write to it directly, character by character. Here’s how Arduino’s LiquidCrystal class implements it:
// LiquidCrystal.cpp

inline size_t LiquidCrystal::write(uint8_t value) {
  send(value, HIGH);
  return 1; // assume sucess
}

void LiquidCrystal::send(uint8_t value, uint8_t mode) {
  digitalWrite(_rs_pin, mode);

  if (_rw_pin != 255) { digitalWrite(_rw_pin, LOW); }

  if (_displayfunction & LCD_8BITMODE) {
    write8bits(value);
  } else {
    write4bits(value>>4);
    write4bits(value);
  }
}
Remember that if your display uses a driver chip (like the HT1621 LCD driver) or has an internal driver, the .write() method should write to its RAM, not directly to the display hardware.
Practice: Bringing Your Display to Life
You can find the complete code for this article at this link. Feel free to modify it to work with your own display.
IMPORTANT: You’ll notice that the project doesn’t include any Arduino’s .ino file. The reason is that, personally, I compile from the command line; however, it’s not difficult to use the code in sketches: just add the Display_HC595.cpp and Display_HC595.hpp files and paste them into your sketches.
while( 1 )
{
delay( SYSTEM_TICK );
display.update();
// update the display every 5 ms
if( --time_delay == 0 )
{
time_delay = MILLIS_TO_TICKS( 1000 );
if( not first_time )
{
display.clear();
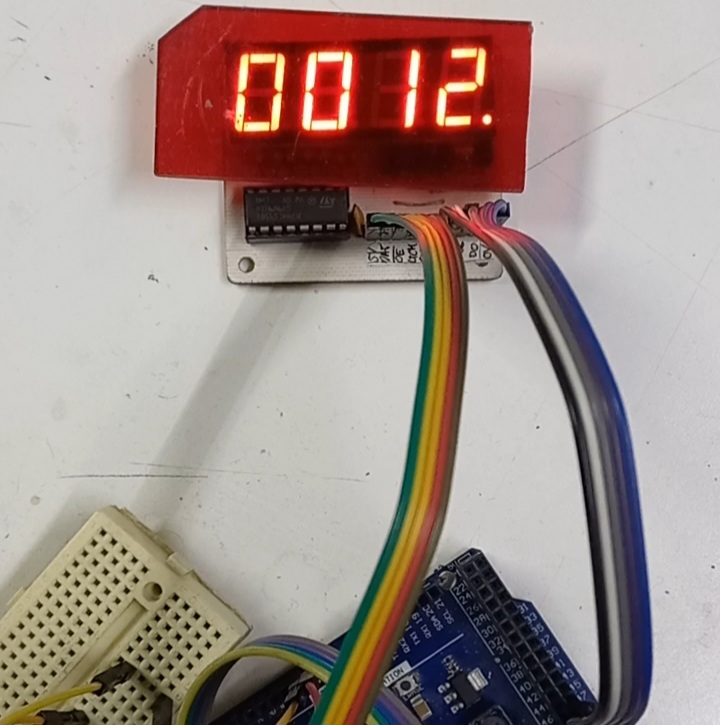
display.print( "0000" );
// we're printing a string (for zero-padding)
if( cont < 10 ) display.setCursor( 3 );
else if( cont < 100 ) display.setCursor( 2 );
else if( cont < 1000 ) display.setCursor( 1 );
display.print( cont );
// we're printing an integer
display.showDP( 3 );
// insert a decimal point in digit 3 just for fun
--cont;
if( cont == 0 )
{
cont = 15;
first_time = true;
}
}
else
{
display.clear();
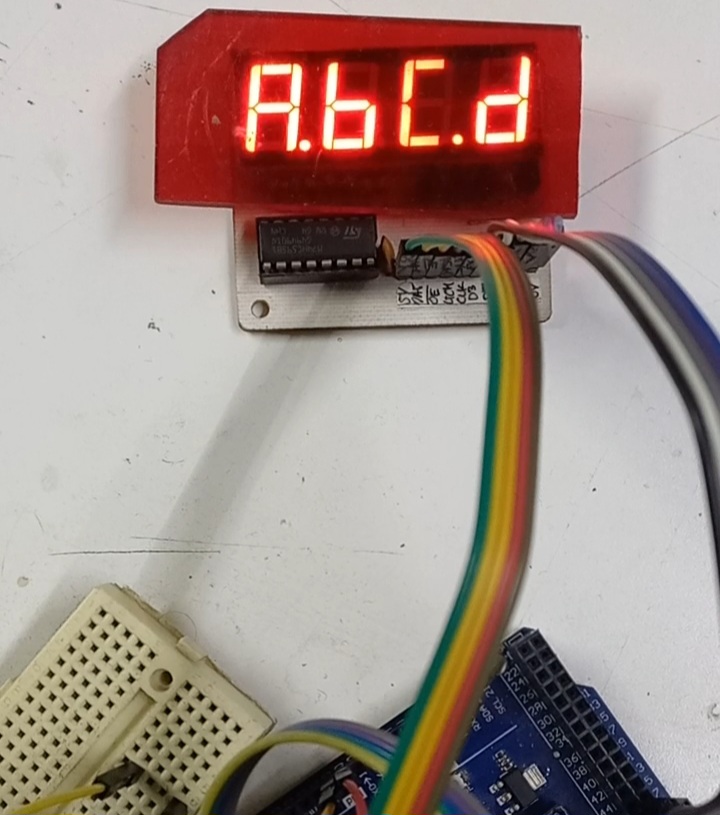
display.print( "A.BC.D" );
// decimal point is part of a string, twice!
first_time = false;
}
}
}
Below you’ll see my display working. Please note a text with two dots (you can even turn on the 4 dots at the same time!) and how easy it was to achieve it:
Implementation in Other Types of Displays
It’s important to note that this technique works specifically with displays that print text. In my example, I used a 4-digit, 7-segment display featuring the 74HC595 shift register. You can find many variations of these displays. If you don’t like my driver, you can find or write one that better suits your needs.
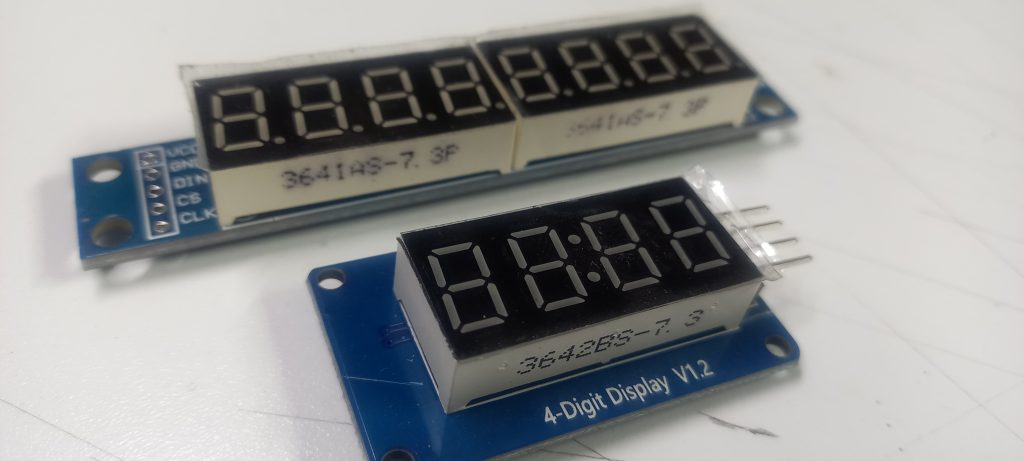
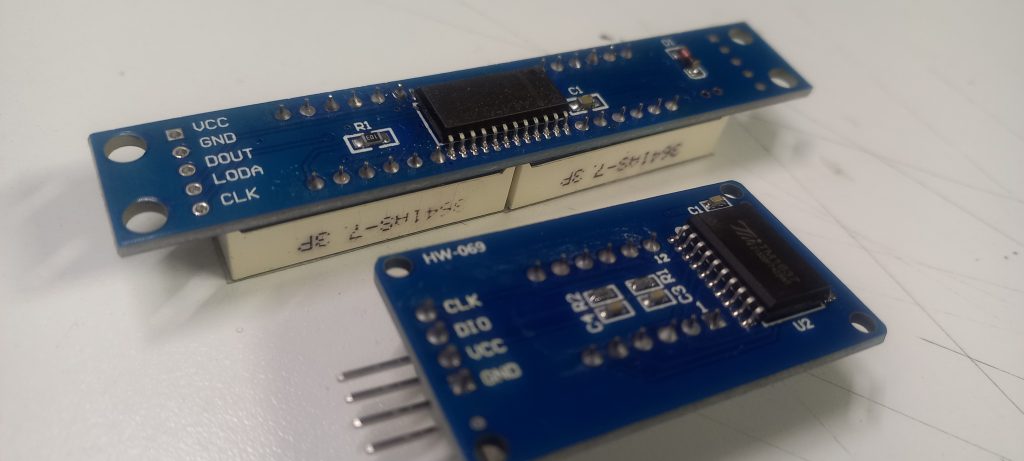
Similarly, there are many displays that communicate via serial, using either I2C or SPI. Some 16×2 LCDs use a PCF8574 port expander with I2C, while others, like those with the MAX7219 or TM1637, use SPI.
In any case, you need to identify the connection point between the Print::write() method and the location where you actually write or store a single character.
What’s Next?
Today, we’ve explored how to use the Arduino abstract base class Print to simplify printing tasks. You might be wondering: «I don’t use the Arduino platform, can I still use this?» Or, «If a client asks me to move from Arduino to another platform, can I take this tool with me?»
The answer is yes! With a little effort, you can adapt the Print class for use outside the Arduino ecosystem. It’s easier than you think, but that’s a topic for another article. In the meantime, I encourage you to give it a try.
I hope this information has been helpful. See you in the next article!
¿Ya conoces mi curso gratuito de Arduino en tiempo real, utilizando el Arduino UNO o el Arduino Due y FreeRTOS?
¿Te gustaría ser de los primeros en recibir las actualizaciones a mi blog? ¡Suscríbete, es gratis!

Mi perfil completo lo puede encontrar en: https://www.linkedin.com/in/fjrg76-dot-com/
- Arduino and ESP32 whims - diciembre 17, 2025
- Writing Scalable Firmware: Implementing the Command Pattern in C++ - diciembre 4, 2025
- Patrón de diseño de software Command para sistemas embebidos para los no iniciados - noviembre 30, 2025
Deja una respuesta
Lo siento, debes estar conectado para publicar un comentario.